Sunday, August 8, 2010

Reclaimed Headboard

Oh my goodness!  I am in LOVE with Ana from Knock Off Wood.  Tara has posted about Ana's skills and talent before, and I am here to agree with Tara, this woman is amazing! 

Mike and I finally decided it was time to upgrade our Queen size bed to a King.  Now, we are both fairly small people and a queen should be more than enough for the two of us, but Mike is a bed hog and a blanket hog too.  He likes to claim that he only gets 10% of the bed and blankets, but I beg to differ.

Solution- KING SIZE. 

We have a KING mattress now but only a queen bed....uh oh! 

Solution- KNOCK OFF WOOD!

Here is our completed Reclaimed Wood Headboard. 


See the cute little bench at the foot of my bed?  Mike made this for me YEARS ago to go with our log bed.  We decided to not do a foot board and use the bench instead. After a coat of primer, paint and glaze, it matches perfectly!
Now, don't focus on the bed skirt wrinkles....or the fact that I have a queen duvet cover on my bed.  New bedding is in the works, I just haven't found what I want yet!

The plans to the Reclaimed Headboard are here, the instructions are simple to follow and make perfect sense.  We had the headboard built in just a few hours, the next day we sanded, primed, painted, sanded again, and glazed.  By dusk the second day, our headboard was attached to our bed frame and looking beautiful as ever.

As Tara said before, all the plans at Knock Off Wood are free.  Can you believe it?  Isn't that great?  I think so!  She creates very sturdy pieces and they can all be done very inexpensively.  The total cost for this headboard was only $50.00.  A.M.A.Z.I.N.G.  The wood cost just under $40, the primer was $8.  We already the paint and glaze leftover from a previous project (sweet!) and the bolts to attach to the bed were about $2.00.

Once you build something from this site, you will never want to purchase another piece of over priced furniture again.  With the help from Ana, some power tools and wood, you can build just about anything!!

Now, get over to Knock Off Wood, find something fabulous and get to building!  You will be so happy you did.


Summer Craft Night!

Our summer craft night was a hit! We had several women who joined in the fun. We painted, sanded, crafted, glued, talked, laughed and visited! Thanks to everyone who joined in! Here are some pics of friends and projects...


Thanks again everyone! All the projects turned out FABULOUS!!!


Thursday, July 22, 2010

BoArD, bOaRd, BoArD!!!


When I saw this idea over at Craftomaniac I knew I had to have one! Only because Charlee is constantly telling me she is BORED! This project couldn't have been more fun because I got to think of fun things that I am okay with the kids doing when they are bored!! The other thing I loved about it, I had a PERFECT place to hang it once it was completed!


Or maybe with school starting, having a display board of your cute kiddos art work is what you need? This idea is brilliant! Clears up the clutter off the fridge and puts it in a designated place, making life just a little easier! And, acknowledges your sweeties talents and gives them a boost of self esteem! Every parent knows it breaks your little ones heart if you don't display something they are so proud of! Besides, kids art work is the BEST!


Now this, I LOVE! I am not sure where we found this idea (my apologies to the creator) but it is perfect for busy families and is actually cute home decor. Using a frame, burlap, glass, paper and a white board marker, you have everything you will need to plan your weekly menu and get yourself a little more organized....especially with back to school right around the corner!

Now, originally we would have a short tutorial on how to put these crafties together, BUT we are going to have a special CRAFT NIGHT!!! Crae's Creations & Co. will provide all the supplies, fun, music, laughter, visiting and get to know yous on August 4th at 6:00 p.m. All you need to do is show up and put it together, and have lots of fun! (Location of this super awesome fun craft night? Probably at Julie or Tara's house...details to come.)

Remember, Christmas will be here before you know it. Each one of these craft projects would make a GREAT Christmas gift and fairly inexpensive too!

If you are interested in making any one of these (or ALL) the cost will be only $10.00 for each project. If you live in the St. George area, come have a super fun GIRLS CRAFT NIGHT! Now, if you don't live in the St. George area and still want one???? contact me, I am sure we can work something out. (Like: get you the supplies and mail them, or send you a completed project???)

Want in on the action? email me at craescreations(at)hotmail(dot)com

Let us know what project(s) you want to do and if you want black or white paint. If you choose black paint, your font color will be tan. If you choose white paint, your font color will be black. On the menu board, the font will be black and you have a paint color choice of black or white. The deadline to join the craft night is July 30th. We need to have a count of how many and what projects you want to do so we have a few days to get all the wood cut out, sanded, and gather the supplies needed. Come join the FUN!


Thursday, June 24, 2010

Lanyard Tutorial


Here is the short version of the story behind making a lanyard.  I am the Girls Camp Director for my church.  I am a member of The Church of Jesus Christ of Latter Day Saints.  (Click here if you are interested in learning more about the LDS faith.)  During one of our camp prep meetings, there was a suggestions to give each girl and leader a lanyard to attach the daily agenda (small of course), award beads and charms, whistle, etc.  Now, in the small town I live in I wasn't finding much of anything.  And, if I did they were UGLY!  I then tried the trusty ol' Internet, priced out some CUTE ones, and they were more than our budget could afford.  So, what did I do?  I found some scraps of material, bought some D-Rings, and lobster clasps and went to town.  Wanna make one?  I will show you how! Total cost for this project was under $1.

Supplies
Fabric (or scraps sewn together to make the proper length)
Thread
Scissors
D-Ring ( I found them at Walmart 4 for only 78 cents!)
Lobster Clasp (At the craft store in packs of 2. Use your 50% off coupon.)
Sewing Machine

Step 1:
Cut a 3 inch by width of fabric strip.


Step 2:
Iron a 1/4 inch fold down the length of the fabric.  Repeat on other side.


Step 3:
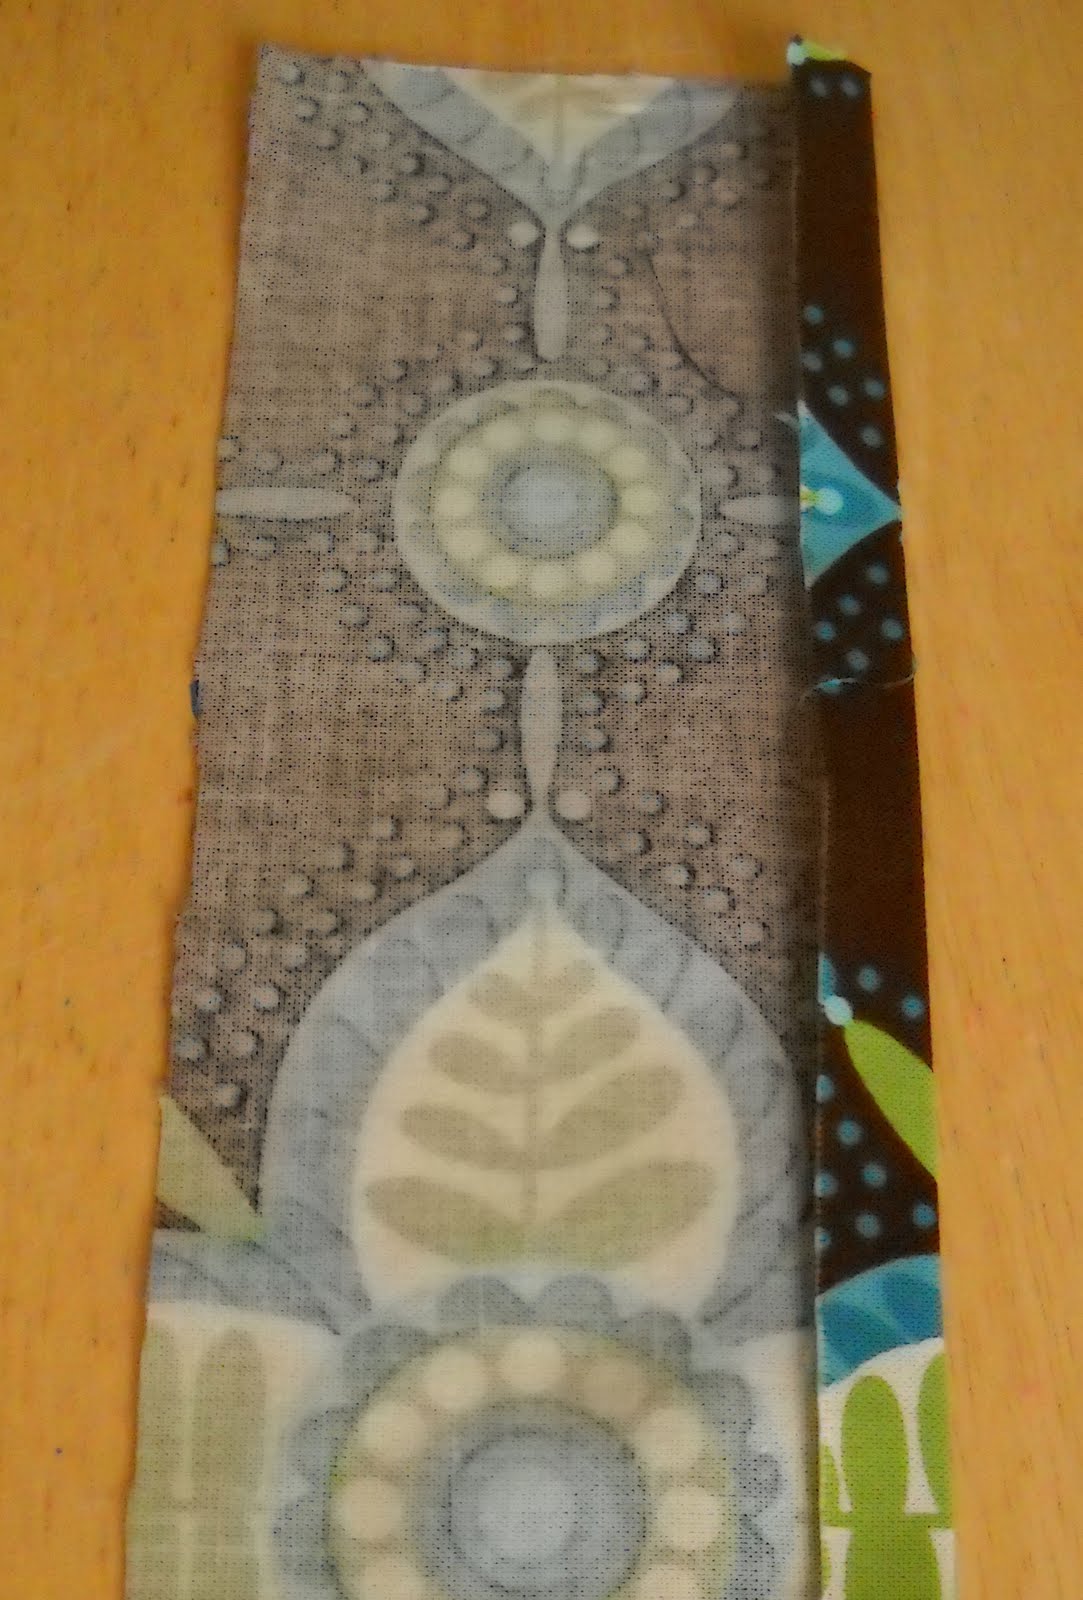
Fold the fabric down center (lengthwise) and iron.  Both of your folded edges will be touching with the right sides facing out.


Step 4:
Sew a seam down the side where the folds meet.  I used the line on the inside of the pressure foot as my guide.  Repeat on the other side.


Your strip of fabric should now look like this.

Step 5:
Loop the fabric through the D-ring with the straight side against the fabric.


Step 6:
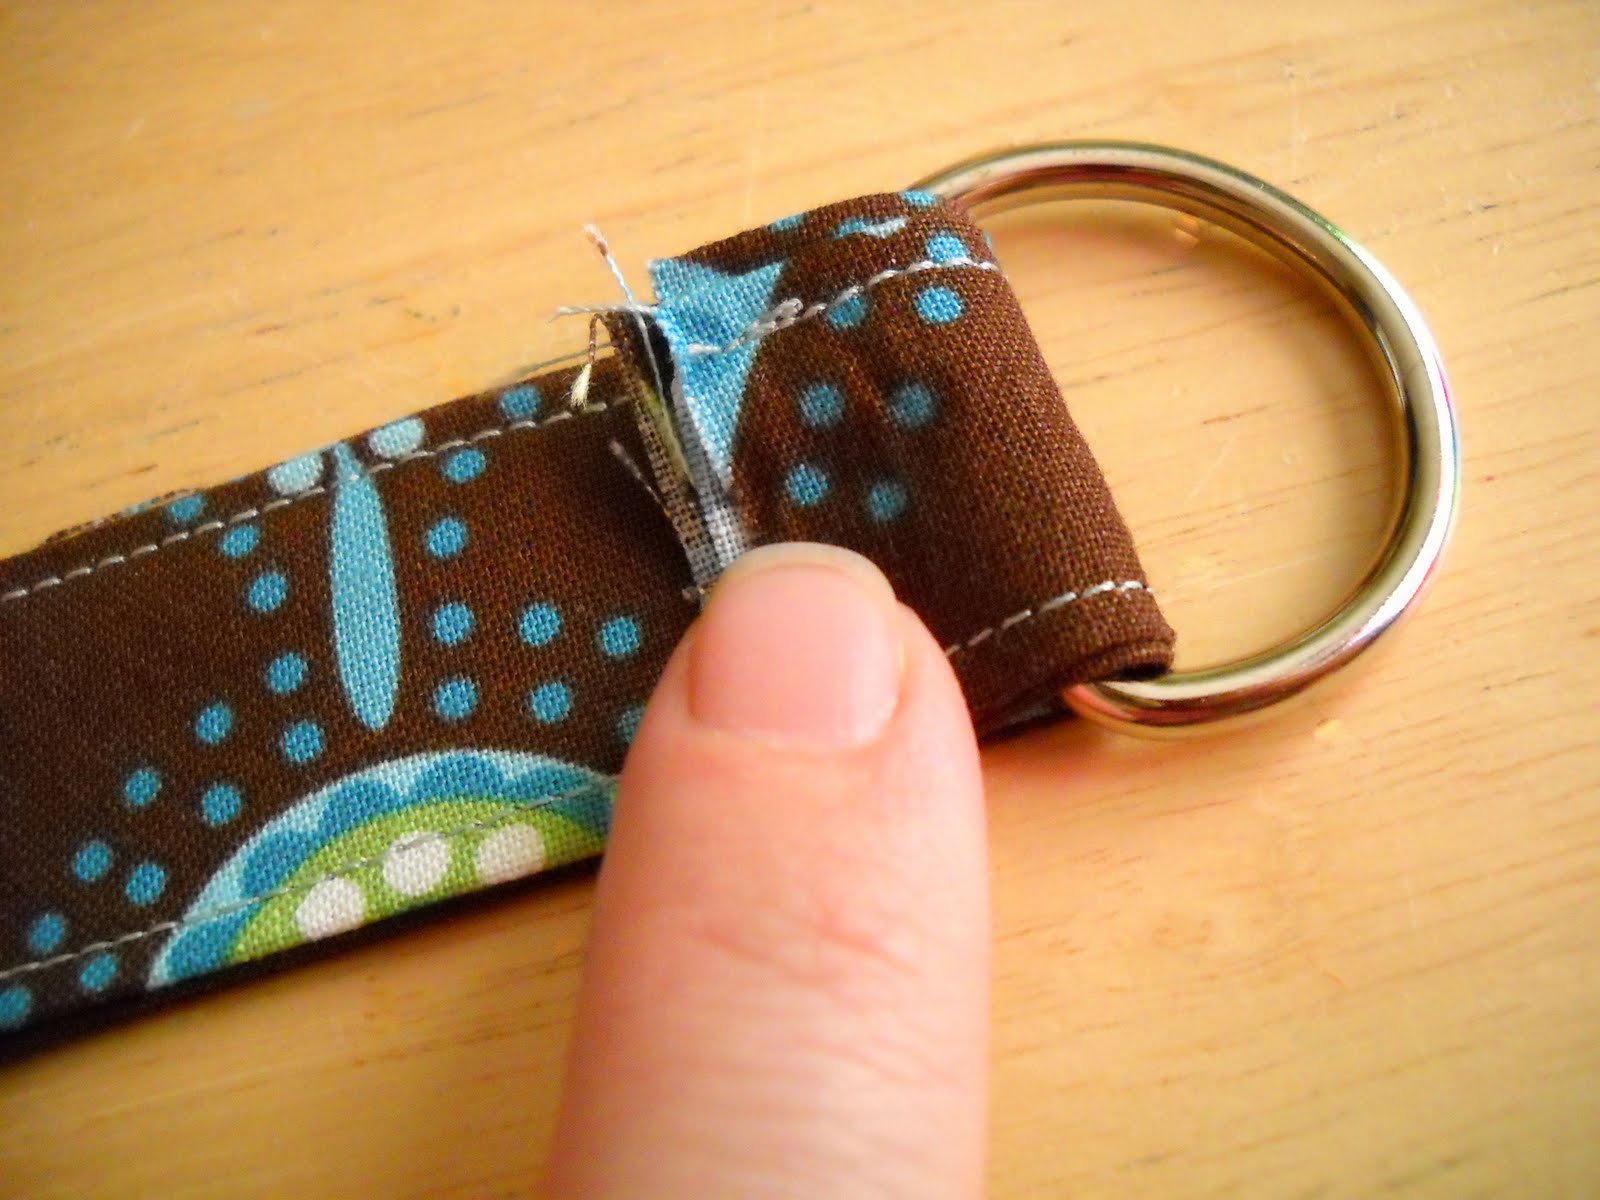
Fold the fabric over again, sliding the D ring down to the bottom.  The raw edge will be flush against the straight part of the ring and tucked inside.


Step 7:
Sew two straight lines along the width of the fabric to secure the ring in place.


Step 8:
Attach a Lobster Clasp on the D ring.


I had some charms on a lobster clasp all ready.  After camp, the girls can use it for their keys, charms, name badges, whatever they would like.  You could also make it shorter and use it for a key chain too!

Thursday, June 17, 2010

Thinking about a Give Away....


I want to do a Great Give Away!  Is that a G.R.E.A.T idea or what?  So, I was thinking I would have to give a give away to our followers.  So, here's the deal.  Follow this blog and when we reach 50 Followers, we will randomly select one and give them one of these FABULOUS, ADORABLE, CUTER than WORDS .... HATS!  The winner will be able to choose the size (itty bitty, small, medium, large, or extra large.) and also request color/pattern choice.  I will do my best to accommodate your color/pattern choice!  Sound easy enough?  Well then, FOLLOW THIS AWESOME CRAFTY BLOG!

A Wreath From Pages of a Book?


I have seen them before and often wondered why??  And, now I know!  They are lots of fun to make, cheap, and much cuter in person than in picture.  Especially when you are looking at my pictures...because I have the WORST camera of all time and I hate it.  (This is a whole other story).  Wanna make one?  Follow these directions here.  I made mine differently by making scrolls, tying together with twine and using hot glue to attach them to a circular wire wreath.  I added a simple bow and hung it on my wreath frame. 

Wreath frame you say?  What is that?  Well check this out here.  I made this about a month ago and it is great!  I have it hanging on the wall at the end of my hallway.  I painted mine black, distressed the edges with sandpaper, and glazed over it.  It looks amazing!  The best part about that project was it was completely FREE!  We had some leftover bead board and moulding from our kitchen project. I love FREE craft projects.

Now, back to the wreath.  You have to check out all the different styles out there.  If you know you want to make one, but aren't sure which style, just google book page wreath, click on images and your bound to find one you like!

SnIcKeRdOoDlE CuPcAkEs


If you love Snickerdoodle Cookies, you are going to LOVE Snickerdoodle Cupcakes!  I got the recipe from Martha Stewart here.  I have made these cupcakes a few times and have come to the conclusion the Seven Minute Frosting Martha uses, is not my favorite.  Use buttercream frosting instead and I guarantee you will not be disappointed.  But, if you like meringue frosting, then follow her directions exactly!
Now, get to bakin' and let me know how you like them!