

Here is the short version of the story behind making a lanyard. I am the Girls Camp Director for my church. I am a member of The Church of Jesus Christ of Latter Day Saints. (Click here if you are interested in learning more about the LDS faith.) During one of our camp prep meetings, there was a suggestions to give each girl and leader a lanyard to attach the daily agenda (small of course), award beads and charms, whistle, etc. Now, in the small town I live in I wasn't finding much of anything. And, if I did they were UGLY! I then tried the trusty ol' Internet, priced out some CUTE ones, and they were more than our budget could afford. So, what did I do? I found some scraps of material, bought some D-Rings, and lobster clasps and went to town. Wanna make one? I will show you how! Total cost for this project was under $1.
Supplies
Fabric (or scraps sewn together to make the proper length)
Thread
Scissors
D-Ring ( I found them at Walmart 4 for only 78 cents!)
Lobster Clasp (At the craft store in packs of 2. Use your 50% off coupon.)
Sewing Machine
Step 1:
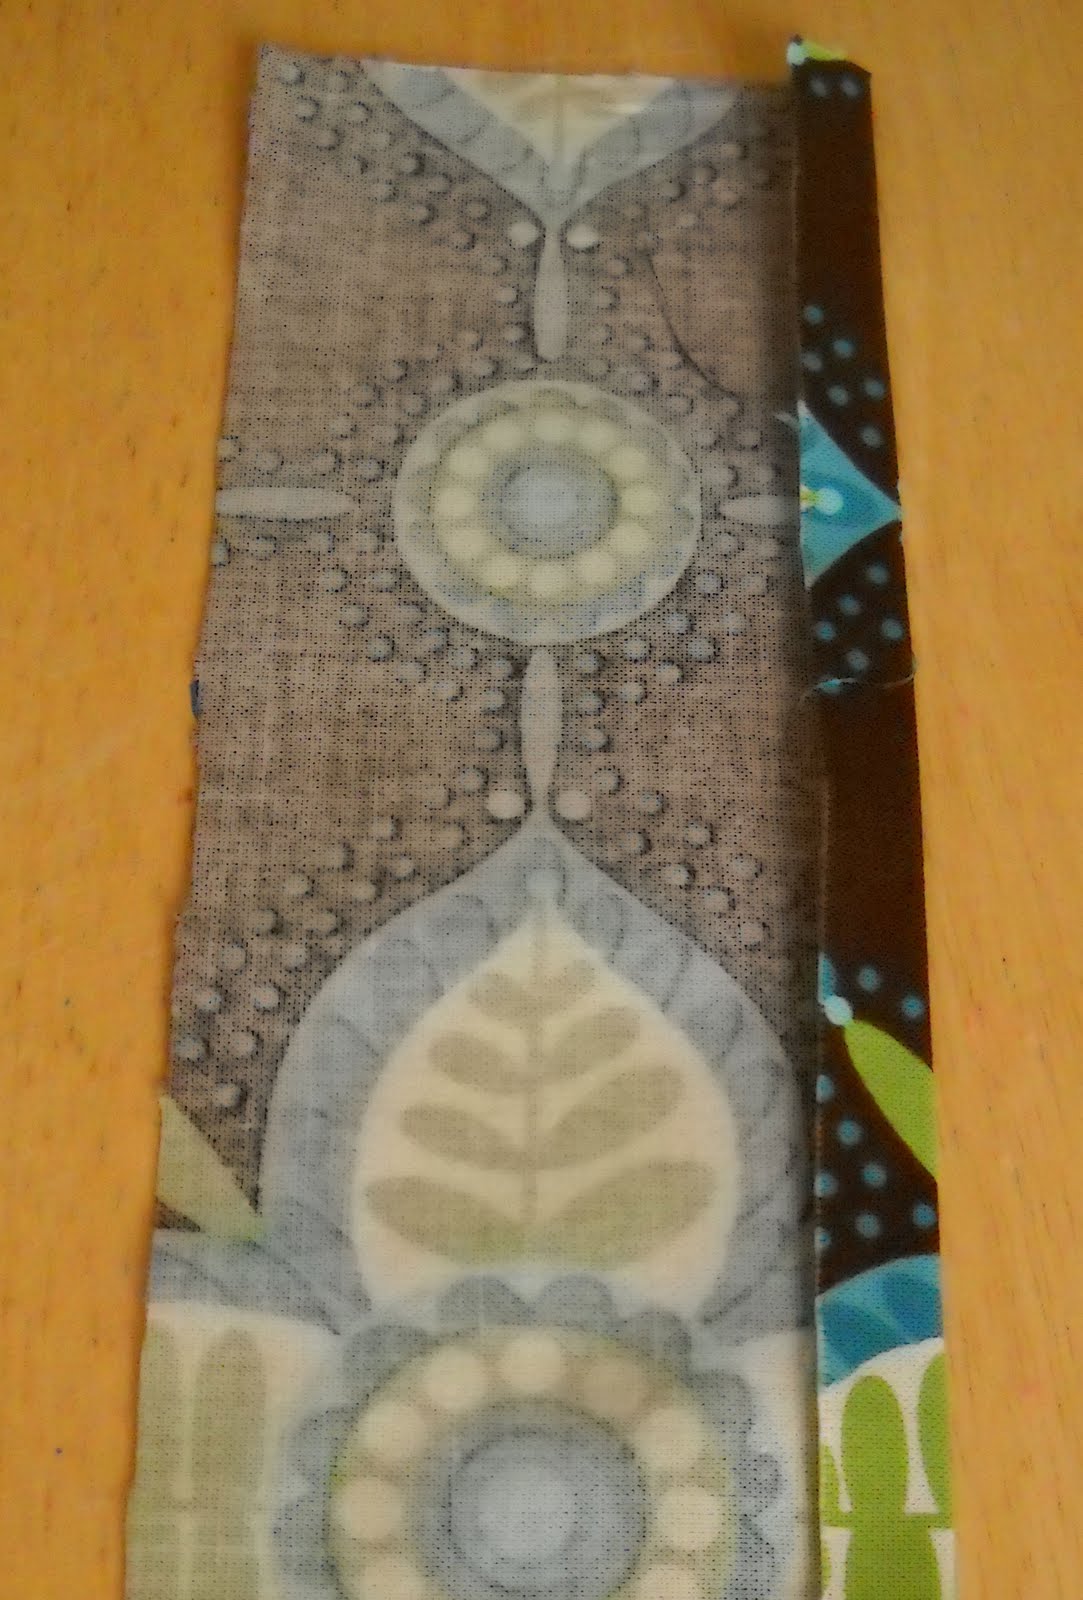
Cut a 3 inch by width of fabric strip.

Step 2:
Iron a 1/4 inch fold down the length of the fabric. Repeat on other side.

Step 3:
Fold the fabric down center (lengthwise) and iron. Both of your folded edges will be touching with the right sides facing out.

Step 4:
Sew a seam down the side where the folds meet. I used the line on the inside of the pressure foot as my guide. Repeat on the other side.


Your strip of fabric should now look like this.
Step 5:
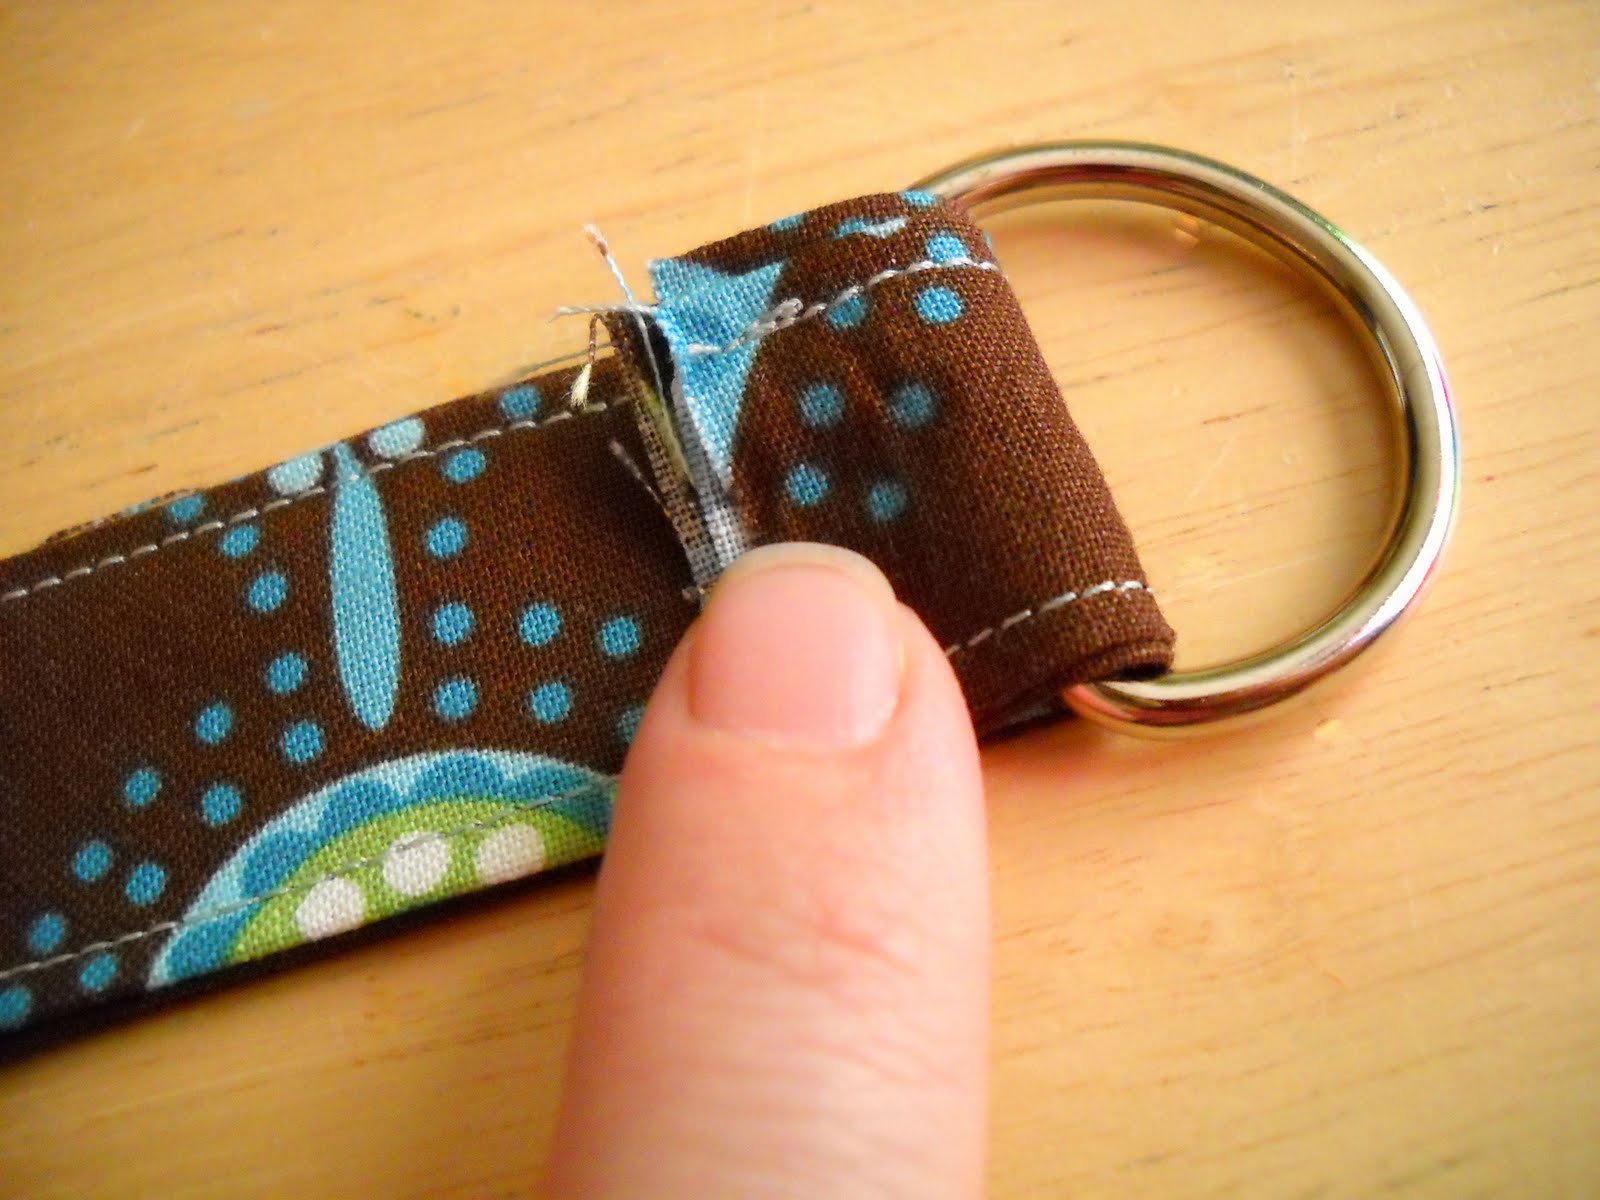
Loop the fabric through the D-ring with the straight side against the fabric.
Step 6:
Fold the fabric over again, sliding the D ring down to the bottom. The raw edge will be flush against the straight part of the ring and tucked inside.

Step 7:
Sew two straight lines along the width of the fabric to secure the ring in place.

Step 8:
Attach a Lobster Clasp on the D ring.

I had some charms on a lobster clasp all ready. After camp, the girls can use it for their keys, charms, name badges, whatever they would like. You could also make it shorter and use it for a key chain too!


7 comments:
I just found your blog through Brown Paper Packages Super Saturday idea post. So glad I did. You have some really cute ideas.
I was wanting to find a tutorial on this for my pool key, and whala... via BPP.
cutie cute Jules...as always. :)
Very impressive! Thanks so much for sharing! You are amazing!
i love it
How long does the fabric need to be?
This is such an easy DIY project that I'm definitely going to try.
Post a Comment